Managing a WordPress site with numerous posts often involves the need to reorganize content across categories, tags, or custom taxonomies. Editing each post individually can be an arduous task. Fortunately, there’s an efficient solution at your disposal: the Bulk Move plugin.
Using the Bulk Move Plugin: A Step-by-Step Guide
Let’s explore how you can harness the power of the Bulk Move plugin to seamlessly relocate your posts in bulk, thereby saving you time and effort.
Installation and Activation

Begin by installing and activating the Bulk Move plugin from the WordPress plugin directory. This user-friendly tool is readily available to assist you in streamlining your content management process.
Navigating to Bulk Move
Once the plugin is activated, navigate to the ‘Tools’ section in your WordPress dashboard and select ‘Bulk Move.’ This is where the magic happens.
Selecting Categories
Now, you’re ready to specify the categories you want to move posts from and to. For instance, if you wish to transfer posts from one category to another, simply select ‘Category’ in both the ‘From’ and ‘To’ dropdown menus.
Designating Source and Destination Terms

In this step, pinpoint the source and destination terms for the posts you intend to relocate. For instance, if you aim to move posts from the category “Fitness” to “Updates,” select “Fitness” in the first dropdown and “Updates” in the second.
Execute the Bulk Move
With your selections in place, click the “Bulk Move” button to initiate the process. Rest assured, the plugin will provide a confirmation message before proceeding, ensuring you’re making the right move.
Repeat as Necessary
Feel free to replicate these steps for any other category types you wish to reorganize. The Bulk Move plugin simplifies the process, making it a breeze to manage content effectively.
Posts in multiple categories? This plugin can fix that
For those grappling with posts assigned to multiple categories, the Bulk Move plugin is a handy problem solver. Say goodbye to duplicate content issues with the following steps:
Single Category Assignment
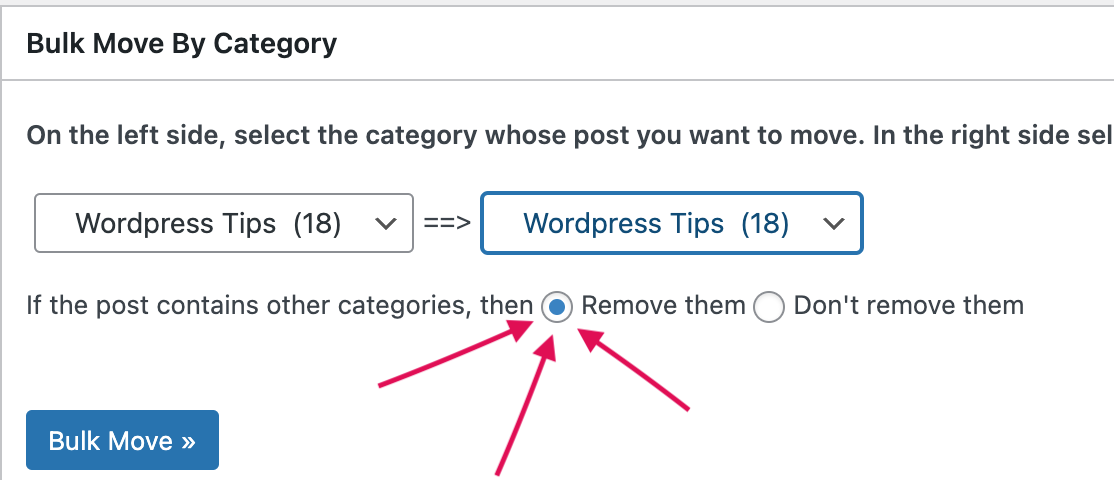
Navigate to ‘Tools’ and then ‘Bulk Move.’ Select your preferred category. It’s essential to choose the same category in both dropdown menus. Additionally, enable the “If the post contains other categories, then remove them” toggle.

Click on the “Bulk Move” button once more, and voila! Your posts will now be assigned to a single category, eliminating any other assigned categories in the process.
Use Cases for Publishers Applying to Ezoic
Publishers exploring opportunities with Ezoic can benefit significantly from the Bulk Move plugin. If you’re striving to rearrange your categories and posts to enhance navigation for Google Ad Manager Domain approval, this tool is your ally.
You did it
That’s it! You have successfully moved your posts in bulk from one category, tag, or custom taxonomy to another using the Bulk Move plugin. This plugin can save you a lot of time and hassle when you need to reorganize your posts on your WordPress site.


